How to Wear Practise saree Readymade (Model3)
Many students find wearing a regular saree a chore and cannot imagine something they can barely walk in being worn while doing the various stretches and complex moves of the art form . We are here to Introduce you a Stitched Practice Saree. We stitch Practice sarees as it can be Ready to wear type … Many Dance schools are using this as a uniform which is very comfortable for Dance Practice . Within a short period of time that is of 3 to 5 minutes you can wear this one and its very comfortable all age of students .Also after wearing this stitched practice Saree its look similar to normal Practice Saree .
Model3
Its stitched with one saree , have two parts Wrap around Skirt and Pallu (Both Wrap around Skirt and Pallu stitched separately for easy to wear) .
Step 1: Wear the Blouse ,Pyjama and the Pallu
• Put on the blouse and button it into place. When worn correctly, the blouse should reach your waistline.

Pic1
- Drape the pallu/Shawl/Davani over your shoulder so the fabric rests on your chest.
- Fasten the pallu into place by tying the front-side pallu threads together at back as shown in Pic1
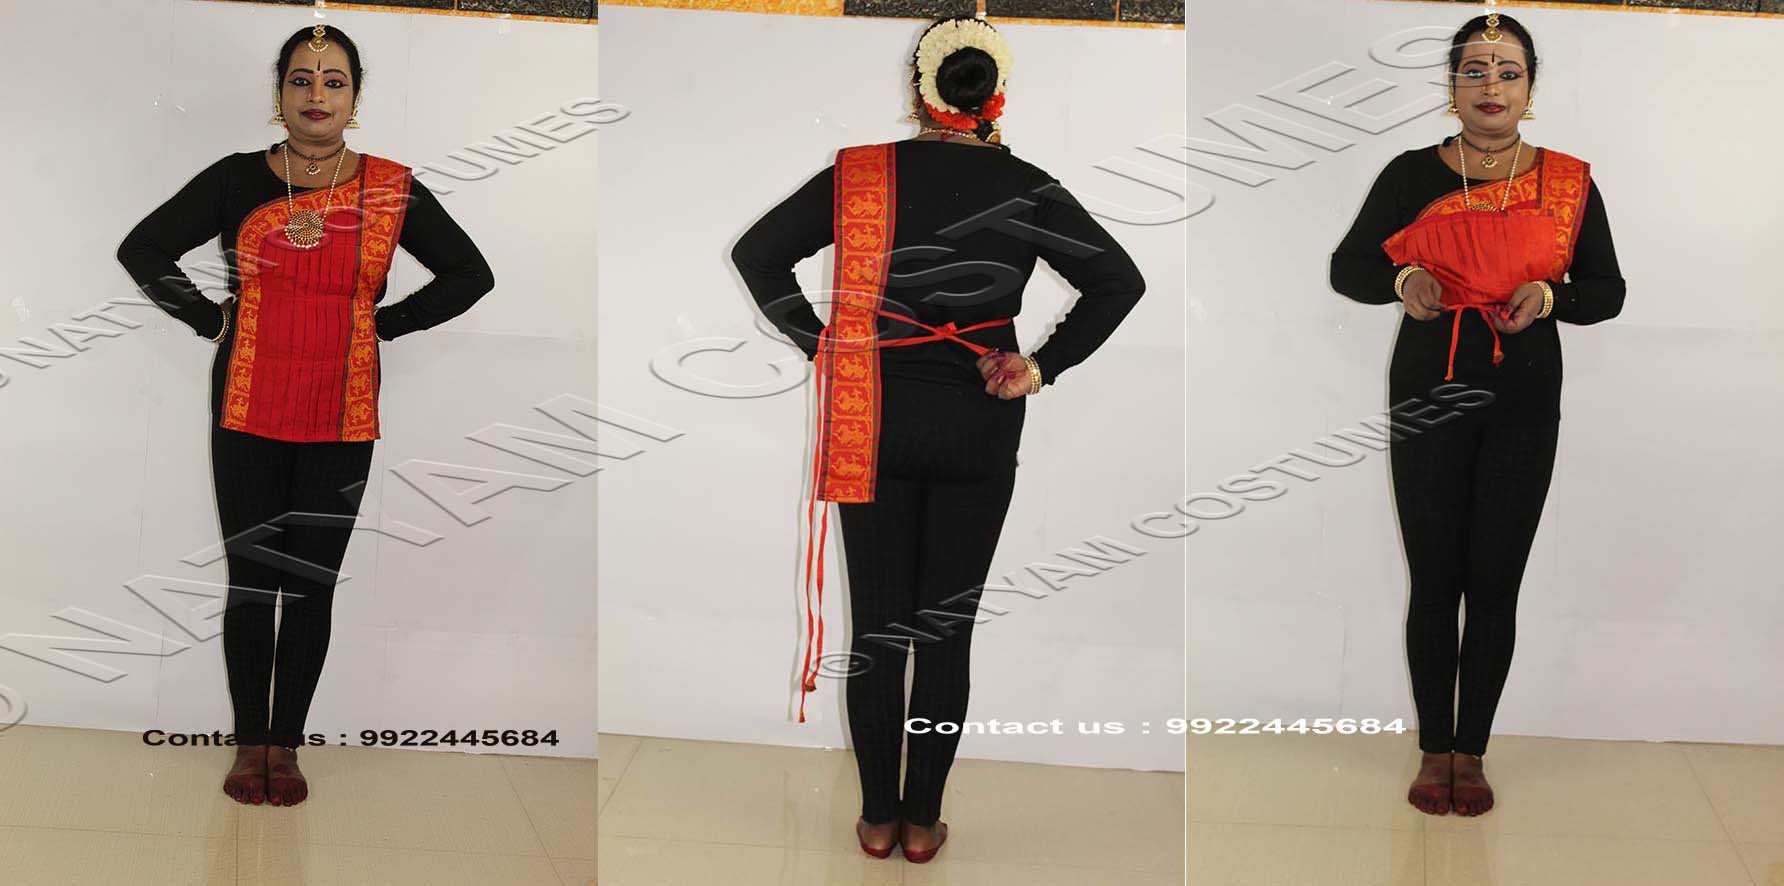
- And back-side pallu (tail) threads together at front like in the pic2
Step 2: Wear the skirt
1.) Drape the pallu/Shawl/Davani’s down part should be tucking beneath the skirt

2.) Right edge of the saree thread should be tie with thread connected before the pleats . Adjust the pleats should be in front center as shown in pic3 .
3.) After tie the thread bring the remaining part of the saree pleats to the front as shown in pic3
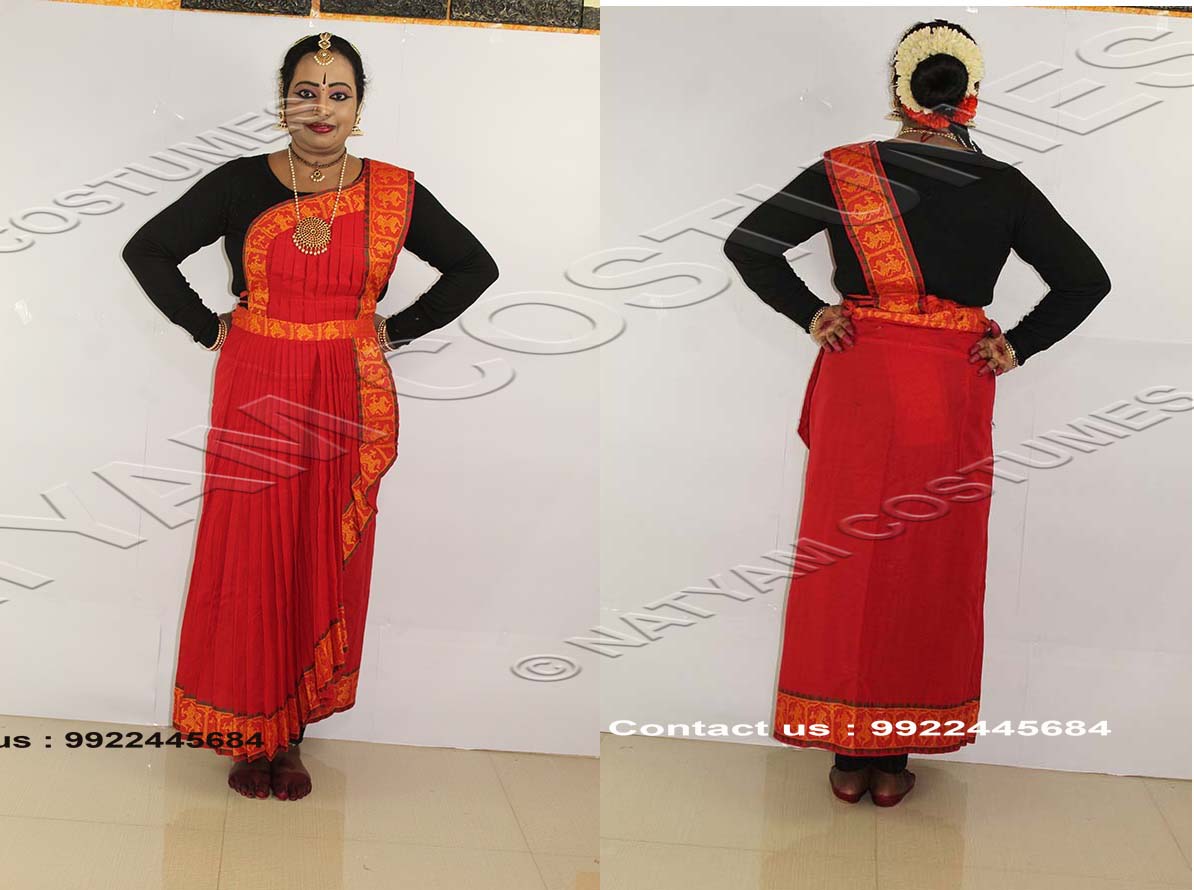
4.) Then tie the thread appropriately as shown in pic4